
Accumulated dust, bird droppings, soot, pollen, and fallen leaves create a persistent layer across photovoltaic (PV) glass, blocking incoming sunlight and dropping daily power generation by up to 15% to 30%. While routine washing is essential to restore peak energy yield, improper maintenance techniques can cause permanent, irreversible harm. Using harsh household detergents, abrasive scrubbing pads, high-pressure washers, or splashing cold water on baking-hot glass can scratch anti-reflective coatings, fracture delicate solar cells, or instantly void your 25-year manufacturer warranty.
Learning how to clean solar panels correctly ensures you maximize daily power generation while protecting your long-term energy investment and keeping safety top of mind.
TABLE OF CONTENT
- Why Incorrect Cleaning Damages Photovoltaic Modules and Voids Warranties
- Essential Safe Solar Panel Cleaning Equipment
- 5-Step Guide: How to Clean Solar Panels at Home Safely
- Approved vs. Prohibited Cleaning Practices Checklist
- Integrating Panel Cleaning with Long-Term Energy Reliability
- Conclusion
- Frequently Asked Questions (FAQs)
Why Incorrect Cleaning Damages Photovoltaic Modules and Voids Warranties
Solar modules are engineered with tempered, high-transmittance, anti-reflective glass designed to withstand severe weather like hail and rain. However, they remain highly vulnerable to localized mechanical stress and sudden thermal shock.
For instance, splashing cold tap water onto solar panels that have reached temperatures of 60°C or higher in direct sunlight causes rapid surface contraction and severe thermal shock, creating microscopic fractures inside the silicon cells that permanently destroy energy output and instantly void your manufacturer warranty.
Thermal Shock Fractures:
On bright days, rooftop glass temperatures easily exceed 60°C. Splashing ambient or cold hose water onto hot glass causes immediate, violent surface thermal shock. This rapid temperature shift creates microscopic cracks inside the silicon wafer cells, permanently degrading power output and rendering performance warranties void.
Scratched Anti-Reflective Coatings:
Scrubbing modules with stiff-bristle brushes, abrasive sponge pads, or dry cloths drags fine dust particles across the glass surface, acting like sandpaper. This leaves micro-scratches on the anti-reflective coating, scattering incoming light away from the underlying solar cells.
Frame Seal Delamination and Water Ingress:
Directing high-pressure water jets from power washers toward frame edges forces water under rubber seals and directly into junction boxes. Over time, this causes internal wiring corrosion, ground faults, and short circuits.
Essential Safe Solar Panel Cleaning Equipment
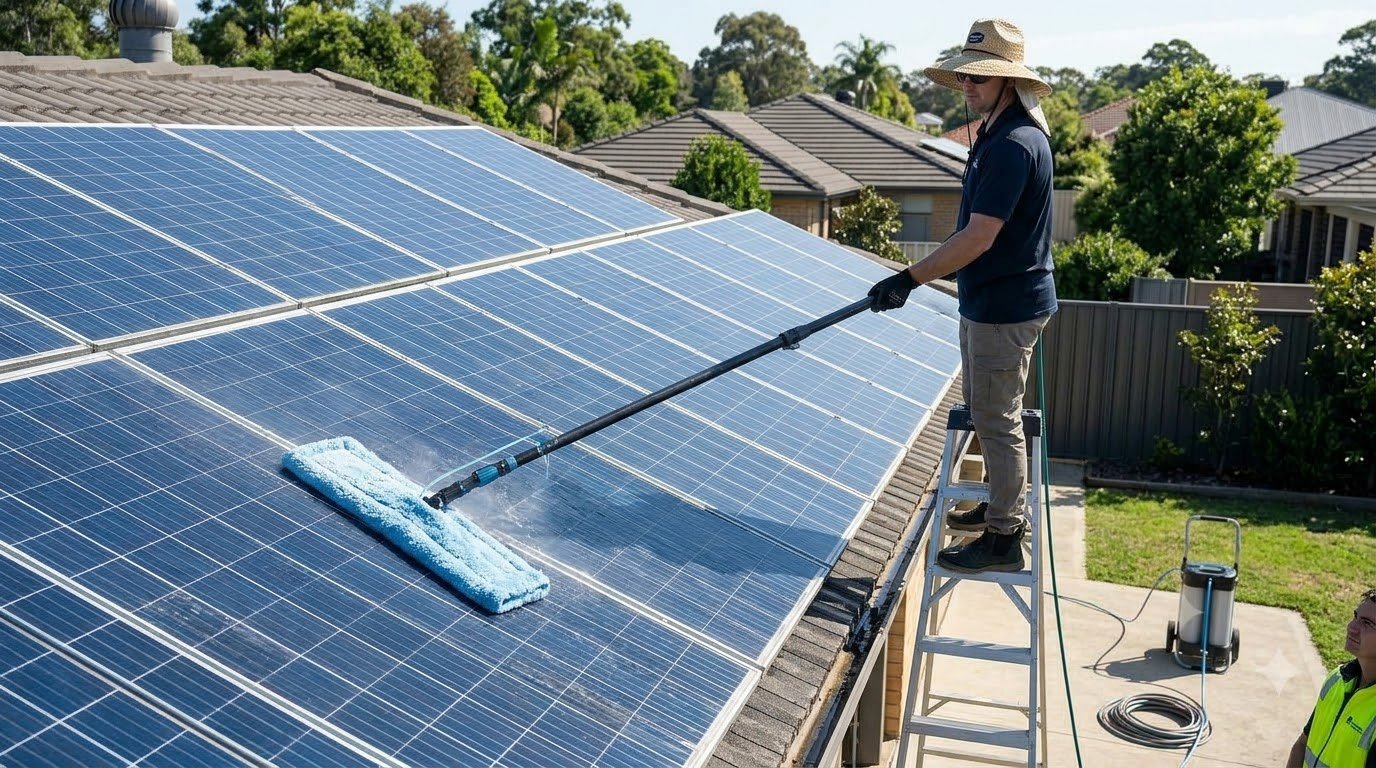
Before learning how to clean solar panels at home, gather warranty-compliant, non-abrasive tools designed specifically for solar glass care:
Purified Water Source:
Deionised water, purified reverse osmosis (RO) water, or low-TDS soft water (prevents hard water calcium spots).
Soft Scrubbing Tool:
Telescopic extension pole fitted with a soft microfiber mop head or ultra-soft bristle car-washing brush.
Rinsing Appliance:
Low-pressure garden hose equipped with an adjustable multi-pattern spray nozzle set to gentle shower.
Finishing Equipment:
Soft rubber-edged window squeegee attached to an extension pole.
Personal Protection Gear:
Roof safety harness, non-slip rubber-soled footwear, and protective eyewear.
5-Step Guide: How to Clean Solar Panels at Home Safely
1. Time Your Maintenance and Isolate Electrical Power
Schedule maintenance for early morning (before 8:00 AM) or late evening (after 6:00 PM) when solar glass is cool to the touch, eliminating thermal shock risks. Before stepping onto the roof, completely turn off your power system: switch off the AC isolator switch at the main distribution board, followed by the DC isolator switch located near your inverter to isolate all live electrical currents.
2. Perform a Ground-Level Pre-Inspection
Before climbing up, inspect your array from ground level. Check for cracked glass, loose cabling, or burnt junction boxes. If physical damage or exposed wiring is visible, do not apply water; contact a certified solar technician immediately.
3. Low-Pressure Hose Pre-Rinse
Never wipe or dry-brush dusty solar panels. Pre-rinse the entire array using a garden hose set to a gentle shower spray. Spray from the top of the array downward to float away surface dust, grit, and loose leaves without dragging particles across the glass.
4. Gentle Microfiber Scrubbing for Stubborn Dirt
For stubborn debris like bird droppings or tree sap, saturate the area with soft water and allow it to soak for two minutes to soften. Dip your microfiber mop into clean water mixed with a few drops of mild, eco-friendly soap. Lightly wipe the glass surface using broad, smooth vertical strokes.
Critical Safety Warning:
Never walk, step, sit, or kneel directly on solar modules or metal support framing. Concentrated point-loads fracture underlying micro-silicon cells even if the outer tempered glass remains unbroken.
5. Final Purified Rinse and Squeegee Finish
Rinse off any remaining soap film using purified water. Pass a soft rubber squeegee across the glass from top to bottom to remove residual standing water. This extra step prevents mineral scaling and water spots from forming as the panels dry. Allow the modules to dry completely before switching the electrical isolators back on.
Approved vs. Prohibited Cleaning Practices Checklist
Cleaning Parameter | Approved Safe Practice | Prohibited Practice (Voids Warranty) |
Water Quality | Distilled, deionised, or soft water | Mineral-rich hard tap water |
Water Pressure | Low-pressure hose shower spray | High-pressure power jet washers |
Scrubbing Tool | Microfiber mops or soft-bristle brushes | Wire brushes, abrasive pads, dry cloths |
Cleaning Solutions | Plain purified water or diluted neutral soap | Harsh chemical detergents, bleach, ammonia |
Cleaning Schedule | Early morning or dusk (cool glass) | Direct midday sun exposure (hot glass) |
Integrating Panel Cleaning with Long-Term Energy Reliability
Understanding how to clean solar panels regularly is only one part of ensuring peak long-term power generation. Combining clean panels with real-time inverter monitoring helps you spot sudden performance drops caused by hidden electrical faults or shading obstructions.
If your location experiences frequent power cuts or grid instability, pair your solar array with high-performance lithium and tubular solar batteries to keep critical household loads running seamlessly day and night. For sensitive electronics like home offices or medical equipment, integrating an online double-conversion UPS system ensures continuous power transfer without microsecond flickering during outages. You can also explore our technical guide on on-grid vs off-grid to match your backup needs with daily energy goals.
Conclusion
Investing in a professional rooftop audit is the single most effective step to safeguard your solar journey. Beyond simply checking roof dimensions, a thorough pre-installation assessment eliminates structural risks, ensures precise panel alignment, and verifies that your electrical infrastructure can safely handle your system’s power generation. By identifying and resolving potential bottlenecks such as structural weak points, seasonal shading, or main distribution board limitations upfront, you ensure your rooftop solar installation operates at peak efficiency from day one and delivers reliable, clean energy for decades to come.